
Rocks are found abundantly in nature, scattered along riverbeds, lying in fields, and dotting mountain landscapes. These seemingly mundane objects, however, hold immense potential to be transformed into stunning works of art. The process of painting on rocks has gained popularity in recent years, not only as a form of artistic expression but also as a therapeutic hobby. With a little imagination, patience, and the right tools, anyone can take an ordinary rock and turn it into a beautiful painted masterpiece.
In this article, we will explore the step-by-step process of transforming a simple rock into a beautiful piece of painted art. We will also delve into various techniques, tips, and tricks that can elevate your rock painting game to the next level. So, whether you’re a beginner or an experienced artist, there’s something here for everyone.
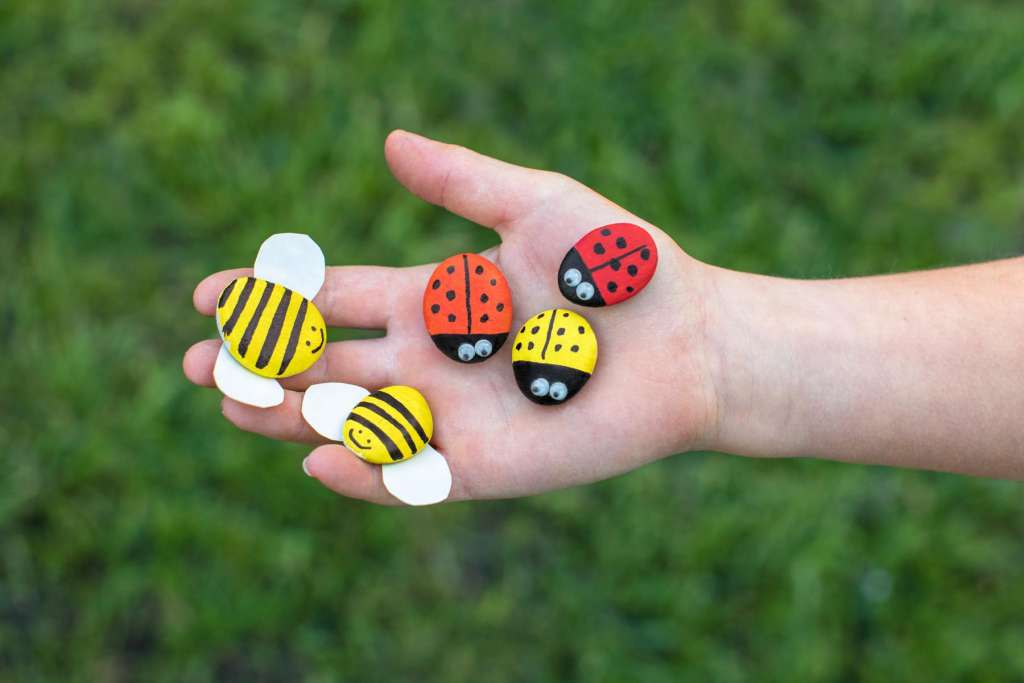
1. Selecting the Right Rock
The first step in any rock painting project is choosing the right rock. Not all rocks are suitable for painting, so it’s important to pick one that’s smooth, flat, and free of cracks. Flat rocks provide a larger surface area for your artwork, while smooth rocks allow the paint to adhere more evenly. Smaller, round stones are ideal for intricate designs, while larger ones can serve as canvases for more expansive creations.
When looking for rocks, think about the overall shape and texture. The best rocks for painting are those that have a relatively uniform texture. Avoid those with too many bumps or rough patches that may interfere with the painting process.
2. Preparing the Rock Surface
Before diving into your painting, it’s crucial to prepare the rock’s surface. Preparation is key to ensuring that the paint adheres properly and that your artwork lasts. Here’s a simple guide for rock preparation:
- Clean the Rock: Wash the rock thoroughly to remove dirt, debris, or dust. A clean surface allows for better paint adhesion. Use warm water and soap, and scrub the rock gently with a brush if needed. Let the rock dry completely before proceeding.
- Smooth the Surface: If the rock has rough patches, use sandpaper or a small file to smooth the surface. This is particularly important if you’re working with rocks that are naturally rough or uneven.
- Prime the Surface: Applying a primer or base coat ensures that the paint sticks well to the rock. White acrylic paint is commonly used as a primer, but you can also use a clear acrylic sealer. Apply a thin, even coat of primer and let it dry completely before beginning your design.
3. Choosing the Right Paints
The type of paint you use is crucial to the outcome of your rock painting. While there are many different kinds of paints available, acrylic paint is widely regarded as the best option for rock art due to its vibrant colors, durability, and versatility.

- Acrylic Paint: Acrylics are water-based paints that dry quickly and can be used on a variety of surfaces, including rocks. They’re available in a range of colors, from basic primary shades to metallics and neon hues. Acrylic paints are easy to work with and can be layered to create depth and texture in your designs.
- Paint Pens: For more detailed designs, especially smaller rocks, paint pens are an excellent choice. These pens offer precision and control, allowing you to create fine lines and intricate patterns. They come in a variety of colors and finishes, including metallic and glitter options.
- Outdoor Paint: If your painted rock will be displayed outdoors, it’s important to use weather-resistant paints. Look for outdoor acrylic paints, which are specifically designed to withstand the elements.
4. Tools You’ll Need
Having the right tools is essential to achieve professional-looking rock paintings. Here are some tools that can help you on your artistic journey:
- Brushes: A variety of paintbrushes is necessary for different techniques. Flat brushes are great for large areas, while detail brushes are ideal for small, intricate designs. Round brushes offer versatility, making them useful for both broad strokes and fine details.
- Paint Pallette: A palette will allow you to mix colors and create custom shades. You can purchase a professional palette, or simply use a plastic plate or paper for easy cleanup.
- Pencil: Before painting, sketch your design lightly on the rock with a pencil. This will serve as a guide for your artwork and help you stay on track as you work.
- Sealer: Once you finish your painting, it’s important to protect your artwork. A clear acrylic sealer will protect your painted rock from scratches, fading, and the effects of weather if it will be displayed outdoors.
5. Creating Your Design
Now comes the fun part—painting your rock! Depending on the complexity of your design, you may need to break it down into multiple steps. Here’s a basic guide to help you get started:
Step 1: Sketch Your Design
Using a pencil, lightly sketch the design you want to paint onto the rock’s surface. You can freehand your design or use a stencil for more accuracy. If you’re new to rock painting, start with simple patterns like mandalas, flowers, or geometric shapes.
Step 2: Base Coat and Background
Start by applying a base coat of paint to the rock. This could be a solid color or a gradient effect depending on the style you’re going for. Let the paint dry completely before moving on to the next layer. If you’re using multiple colors, work in layers, letting each layer dry before applying the next.
Step 3: Add Details

Once the base coat is dry, begin adding details to your design. This is where you can get creative and start layering colors, adding textures, or even using different techniques like dotting or stippling. Don’t be afraid to experiment with various brush strokes and techniques to create depth and dimension in your design.
Step 4: Highlighting and Shading
To make your design pop, use contrasting colors to add highlights and shadows. This can give your artwork more visual interest and make it appear three-dimensional. For example, if you’re painting a flower, add darker shades around the edges of the petals to create depth, then use lighter colors in the center to highlight.
Step 5: Final Touches
Once the main design is complete, take a step back and assess your rock. Are there any areas that need more detail or color? Make any final adjustments, such as adding small details, extra dots, or even a little bit of glitter for added sparkle.
6. Sealing the Art
To ensure your painted rock lasts, it’s important to seal it. This step protects your artwork from fading, chipping, or being damaged by the elements if placed outside.
Use a clear acrylic sealer in either a matte or glossy finish, depending on your preference. Spray a thin, even coat over the rock, holding the can at a distance to avoid drips. Let it dry, and then apply a second coat for extra durability. If the rock will be outdoors, make sure to use an outdoor sealer for optimal protection.
7. Displaying Your Painted Rock
After your rock painting is complete and sealed, it’s time to display it! Here are a few ways you can showcase your artwork:
- Garden Stones: Painted rocks can be placed around your garden, creating a whimsical and personal touch. Arrange them along pathways, in flower beds, or as standalone features.
- Home Decor: Painted rocks can also serve as decorative pieces in your home. Display them on shelves, mantels, or tables to add a pop of color to your living space.
- Rock Hiding: A fun trend in rock painting is hiding painted rocks for others to find. You can leave your beautifully painted rocks in public places for others to discover, which adds an element of surprise and delight for the lucky finder.
- Gift Giving: Painted rocks make thoughtful, personalized gifts for friends and family. Whether it’s a rock with a motivational quote or a hand-painted portrait, these one-of-a-kind creations can be a meaningful gesture.
8. Tips for Success
While painting rocks can be an enjoyable and rewarding activity, there are a few tips that can help ensure your success:
- Take Your Time: Rock painting requires patience, especially when working on detailed designs. Don’t rush through the process—let each layer dry fully before moving on to the next.
- Use Thin Layers of Paint: Instead of applying thick layers of paint, use thin coats to avoid drips and streaks. Multiple thin layers will help create a smoother finish.
- Experiment with Different Techniques: Don’t be afraid to try new things! Experiment with techniques like sponging, marbling, or even creating texture by layering different materials.
- Don’t Be Afraid to Make Mistakes: Rock painting is an art form, and like all art, it’s about expression and creativity. If you make a mistake, simply paint over it and try again. Mistakes often lead to happy accidents that can improve the final design.
9. Conclusion
Transforming an ordinary rock into a beautiful painted art piece is a rewarding process that combines creativity, patience, and skill. With the right materials and techniques, you can turn any rock into a miniature masterpiece that’s a joy to create and display. Whether you’re painting for fun, as a gift, or as a form of self-expression, the possibilities are endless.
So, gather your rocks, paints, and brushes, and let your imagination run wild. In no time, you’ll be creating stunning rock art that reflects your unique style and personality.
