
Transforming a simple wood slab into a stunning coffee table is an exciting and rewarding project that brings both creativity and craftsmanship together. A coffee table is not just a functional piece of furniture; it often serves as the centerpiece of a living room, drawing attention with its unique design and character. By following a series of detailed steps, you can turn an ordinary wood slab into a masterpiece that will elevate the aesthetic of your home.
In this guide, we will take you through the entire process—from selecting the right wood slab to finishing your table with polish and flair. Whether you are a seasoned woodworker or a beginner eager to take on your first DIY project, this article will provide you with the knowledge and techniques to craft a stunning coffee table. Ready to make your own? Let’s get started!
1. Selecting the Right Wood Slab
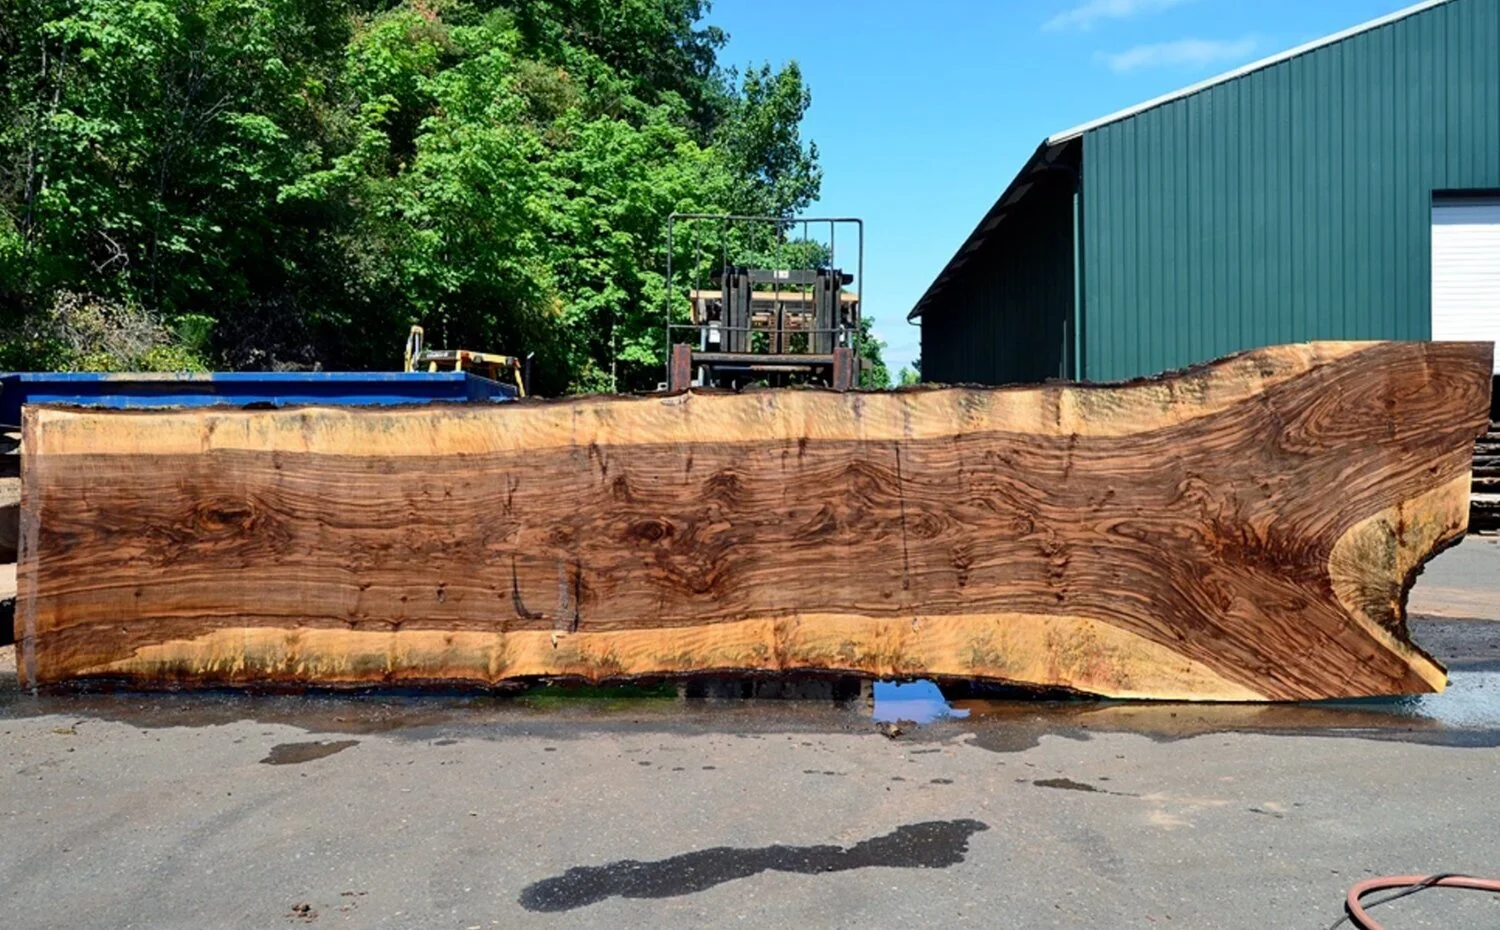
The first step in crafting your own stunning coffee table is selecting the perfect wood slab. This decision will influence the overall appearance, durability, and uniqueness of the finished piece.
Types of Wood for a Coffee Table
- Live Edge Wood Slabs: These slabs have a natural, unfinished edge that adds an organic, rustic charm. Live edge tables are highly sought after for their raw, distinctive beauty.
- Hardwood Slabs: Hardwoods like oak, walnut, and maple are excellent choices for coffee tables. They provide durability, resistance to wear, and often have beautiful grain patterns.
- Exotic Woods: For a more unique or bold look, consider using exotic woods like teak, mahogany, or cherry. These species can bring rich color and texture to your table.
Size Considerations
The size of your wood slab depends on the space available in your living room and the overall design you envision. A coffee table should typically be about 48 inches long, 24 inches wide, and 18 inches high, but these dimensions can be adjusted to suit your needs.
Grain Patterns and Color
When choosing a slab, pay close attention to the wood’s grain and color. A prominent grain pattern, such as the flowing lines of walnut or the striking stripes of maple, can serve as the table’s focal point. Also, think about the tone of the wood—do you want a light, airy look, or a darker, more dramatic feel?
2. Preparing the Slab
Before you can start building the frame or assembling the table, the wood slab itself must be properly prepared. This involves cleaning, sanding, and flattening the slab to ensure a smooth and professional finish.
Step 1: Clean the Slab
Remove any dust, dirt, or debris from the wood surface. You can do this using a soft brush or a damp cloth. If the slab has bark or rough areas, carefully remove them using a chisel or scraper.
Step 2: Flatten the Slab
Wood slabs may have uneven surfaces or slight warping. Use a planer or a hand plane to flatten the top and bottom of the slab. If you’re using a larger slab, consider taking it to a professional woodworking shop that has the proper equipment.
Step 3: Sand the Wood
Sanding is crucial for achieving a smooth, polished surface. Start with a coarse grit sandpaper (around 60-80 grit) to remove rough patches, and gradually move to finer grits (up to 220 grit) for a smooth, flawless finish. Sand along the grain of the wood to avoid damaging the surface.
Step 4: Seal the Slab
If you’re working with a particularly porous wood, such as oak or ash, consider sealing the wood before finishing. Apply a thin coat of wood sealer and allow it to dry completely. This step helps prevent the wood from absorbing too much stain or finish and creates a more uniform surface.
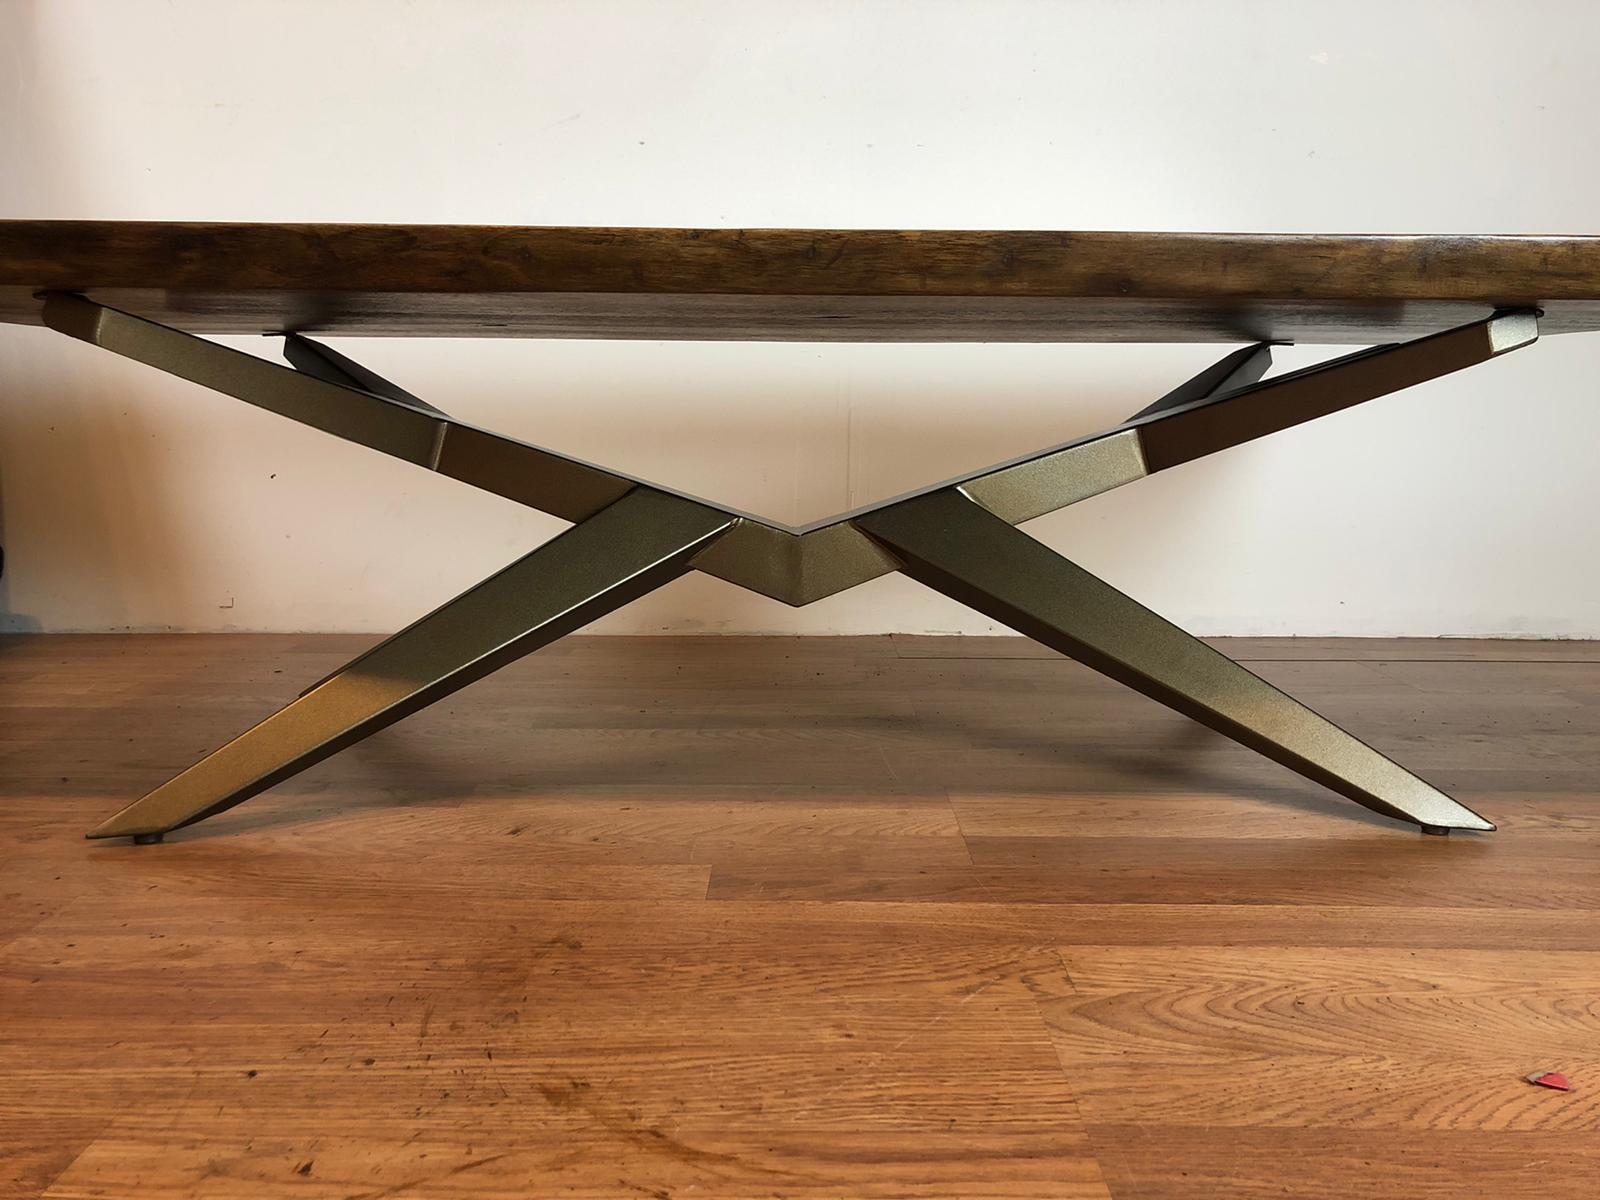
3. Choosing the Right Legs or Base
The legs or base of your coffee table are just as important as the wood slab itself, as they provide support and contribute to the overall style. Here are some ideas for bases that can complement your wood slab:
Metal Legs
For a modern and industrial look, opt for metal legs. Black powder-coated steel or brushed gold legs can add a touch of sophistication and contrast against the natural wood. You can either buy pre-made metal legs or create your own by welding metal tubes into your desired shape.
Wooden Legs
Wooden legs offer a more cohesive, traditional look. If you want to keep things simple, choose straight, turned, or tapered wooden legs. For an updated twist, try mid-century modern-style legs or hairpin legs made from bent steel for a minimalist vibe.
Concrete Base
A concrete base can provide a striking contrast to the organic beauty of a wood slab. You can pour concrete into a mold or use pre-cast concrete blocks to create a heavy, stable base. Concrete bases also work well for larger, heavier wood slabs.
Adjustable Legs
For versatility, consider adjustable legs. These are a great option if you plan to use the coffee table in different spaces or want to change the height of the table for different uses (e.g., as an ottoman or a writing desk).

4. Attaching the Slab to the Base
Once you have prepared your slab and chosen the perfect legs or base, the next step is assembly. Attaching the wood slab to the base securely is essential for the durability and stability of your coffee table.
Step 1: Drill Pilot Holes
Measure and mark the locations where you want to attach the legs or base to the slab. Use a drill to make small pilot holes in the wood, ensuring that they are evenly spaced. Be sure to drill straight and carefully to avoid splintering the wood.
Step 2: Attach the Legs
For metal legs, most legs come with mounting brackets that allow you to easily screw them into the wooden slab. For wooden legs, use wood screws or lag bolts to secure them firmly. If you’re working with a concrete base, ensure that the connection points are reinforced to hold the weight of the table.
Step 3: Reinforce the Joint (Optional)
If you want extra security, you can reinforce the joints with wood glue or brackets. This ensures that the table is stable and can withstand the wear and tear of daily use.
5. Sanding and Finishing the Table
The finishing touch is one of the most exciting aspects of creating a stunning coffee table. The right finish can enhance the wood’s natural beauty and add durability, while also protecting it from stains, spills, and scratches.
Step 1: Sand Between Coats
After attaching the base, lightly sand the entire table, especially around the edges and joints. Use fine-grit sandpaper (320-400 grit) to achieve a soft, smooth surface. This will also help the finish adhere better.
Step 2: Choose the Right Finish
You have several options for finishing your coffee table:
- Oil Finishes: Danish oil, tung oil, or linseed oil are great choices for enhancing the natural beauty of the wood. These finishes penetrate the wood, providing a soft, matte look.
- Varnish: Varnish is ideal for a glossy finish and extra durability. It forms a protective layer on the surface of the wood, preventing stains and scratches.
- Wax: For a subtle, natural sheen, a beeswax or carnauba wax finish can add warmth and depth to the wood.
Step 3: Apply the Finish
Use a clean cloth or brush to apply the finish. Be sure to follow the grain of the wood and apply thin, even layers. Allow each coat to dry fully before sanding lightly and applying the next. Depending on the type of finish and your desired effect, you may need 2-4 coats.
Step 4: Final Touches
Once the final coat of finish is dry, buff the surface to a soft sheen using a soft cloth or buffing pad. If you want to add a bit of character, you can distress the edges slightly using a sanding block or a specialized tool.
6. Enjoying Your Coffee Table
After hours of hard work, your stunning wood coffee table is ready to be the centerpiece of your living room. Place it in the desired spot, and enjoy the sense of accomplishment that comes from creating something beautiful and functional. Don’t forget to place a few accessories—such as a stylish vase, coffee table books, or decorative candles—on top to further personalize the space.
Maintenance Tips
To keep your wood coffee table looking its best, be sure to regularly dust it and wipe up any spills immediately. If the finish begins to show signs of wear, you can always apply a fresh coat of oil or varnish.
