
Handmade paper has existed for centuries, starting as an essential craft for survival, but today, it’s celebrated as a unique blend of art, history, and functionality. While we’ve come to expect paper to be mass-produced by machines, creating it by hand is an immersive and rewarding process. From making your own paper from raw materials to experimenting with different textures and colors, mastering the art of handmade paper can be a creative and meditative endeavor.
But how does one truly become a master of this ancient craft? In this article, we’ll guide you through the essential steps to learn, experiment, and perfect the art of handmade paper, offering a combination of technical tips, historical insights, and personal creativity.
1. The Origins of Handmade Paper: A Historical Perspective
To understand the nuances of handmade paper, it’s important to first acknowledge its rich history. Paper was invented in China around 105 CE by a court official named Cai Lun. While the process was initially rudimentary, it marked the beginning of a major shift in the way humanity would communicate and record information.
Initially, handmade paper was crafted from natural fibers, including bamboo, mulberry bark, hemp, and even cotton. It was a labor-intensive process that involved grinding and soaking plant materials, followed by manual pressing and drying. As trade routes expanded, handmade paper spread through the Islamic world and into Europe, evolving as different regions adapted their techniques and materials.
By the time it reached the West in the 12th century, paper had become an essential tool for education, administration, and art. Today, handmade paper remains a symbol of craftsmanship, artistry, and sustainability.
2. The Basics of Handmade Paper Making: Tools and Materials
Before diving into the techniques, let’s go over the basic tools and materials you’ll need to create your own handmade paper:
Tools:
- Deckle and Mold – The most essential tool in papermaking. The deckle creates the paper’s edges, while the mold helps shape it into a flat sheet.
- Sieve or Screen – This helps drain the water and separate the fibers during the papermaking process.
- Pressing Tools – A rolling pin, or a hydraulic press, helps to remove excess water and flatten the paper.
- Drying Racks or Boards – After the paper is formed, it needs to be left to dry.
- Sponges – Useful for blotting out excess water from the paper.
Materials:
- Plant Fibers – The most common fibers include cotton, hemp, mulberry, and even recycled paper. The type of fiber you use affects the texture, color, and durability of your paper.
- Water – Water is essential for breaking down the fibers and creating the pulp.
- Blender – A high-speed blender is used to break down plant fibers into pulp.
- Colorants and Additives – If you want to add color or texture to your paper, you can use natural dyes or fibers like flowers, leaves, or glitter.
3. Step-by-Step Process: Making Your Own Handmade Paper
Now, let’s move on to the process of creating your own handmade paper. While there are many variations and techniques, the basic process involves creating pulp, forming sheets, and drying them. Here’s a step-by-step breakdown of the process:
Step 1: Prepare the Materials
To begin, you’ll need to prepare your fibers. If you’re using cotton rag, mulberry bark, or hemp, it’s best to tear the fibers into smaller pieces. If you’re using scrap paper, tear it into small shreds. The smaller the pieces, the easier it will be to break them down into pulp.
Step 2: Soak the Fibers
Next, soak the fibers in water for at least 24 hours. This helps soften them and makes it easier to break them down into pulp. The longer you soak the fibers, the more easily they’ll separate during the pulping process.
Step 3: Blend the Pulp
Once your fibers have soaked, use a blender to create the pulp. Add the soaked fibers into the blender, along with water. The goal is to create a smooth, even consistency. Be sure to blend in batches, especially if you’re working with large amounts of fibers.
Step 4: Set Up the Mold and Deckle
Place the deckle (the wooden frame) on top of the mold (the mesh screen). This is the part where the pulp will settle and form a sheet. Make sure the mold is flat, and the deckle is snugly positioned to create even edges.
Step 5: Pour the Pulp onto the Mold
Now comes the fun part. Slowly pour the pulp mixture onto the mold, ensuring that it spreads evenly. Tilt and shake the mold to allow the fibers to settle and form a thin, even layer. You may need to use a spoon or spatula to help spread the pulp evenly across the mesh.
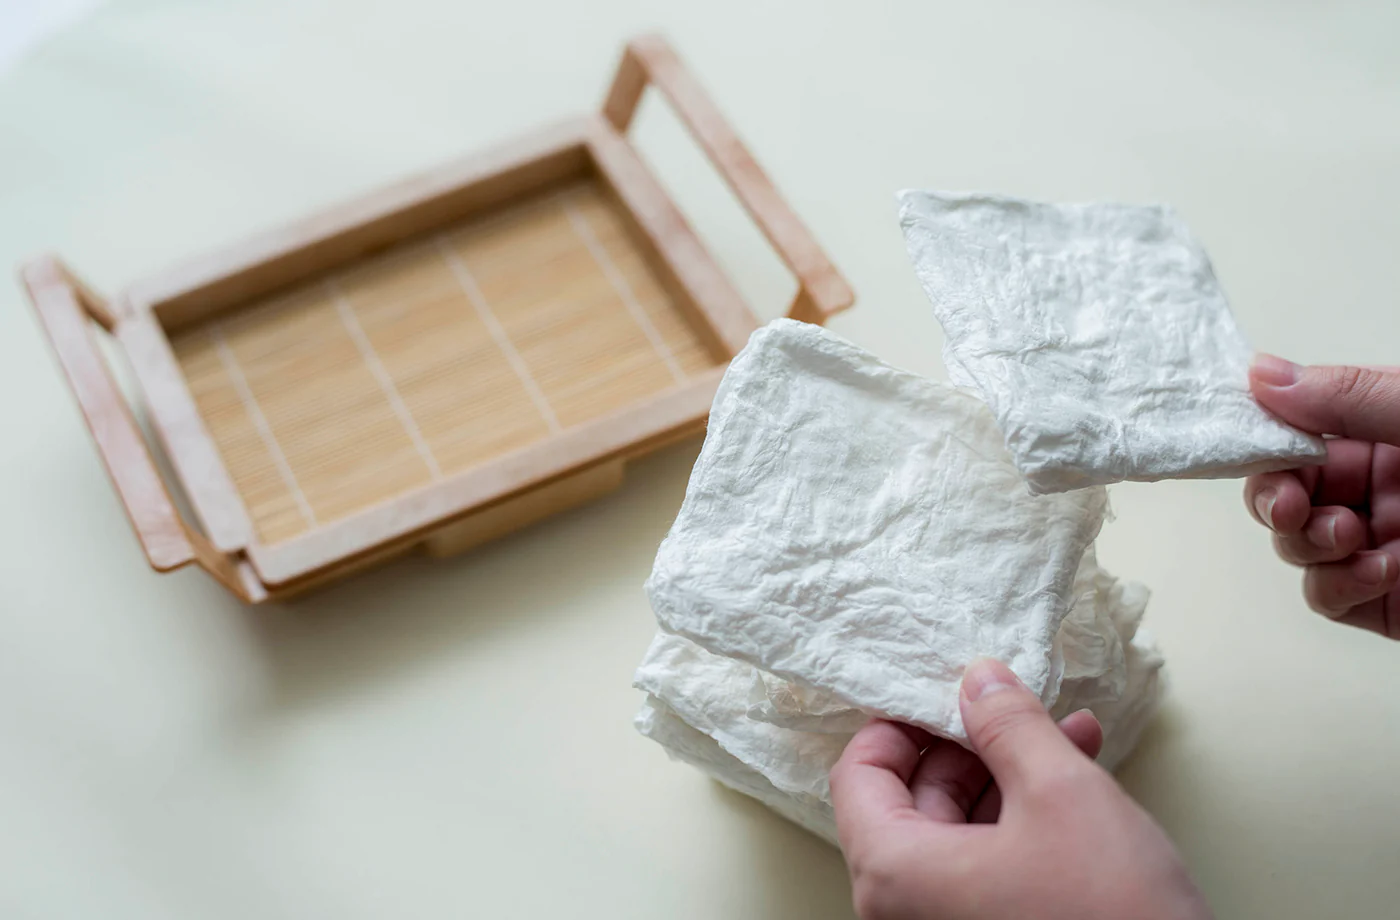
Step 6: Drain the Water
Let the excess water drain away, leaving only a thin layer of pulp on the screen. You can gently tilt the mold to speed up the draining process. Once most of the water is gone, carefully lift the deckle off the mold, leaving a sheet of wet paper behind.
Step 7: Press and Dry the Paper
Once you have the wet paper sheet on the mold, it’s time to press it. You can use a rolling pin, press, or sponge to remove excess water and flatten the paper. After pressing, carefully transfer the paper onto a drying surface, such as a rack or a flat board. Let it air dry for several hours, or use a hairdryer for quicker drying.
Step 8: Trim the Edges and Finish
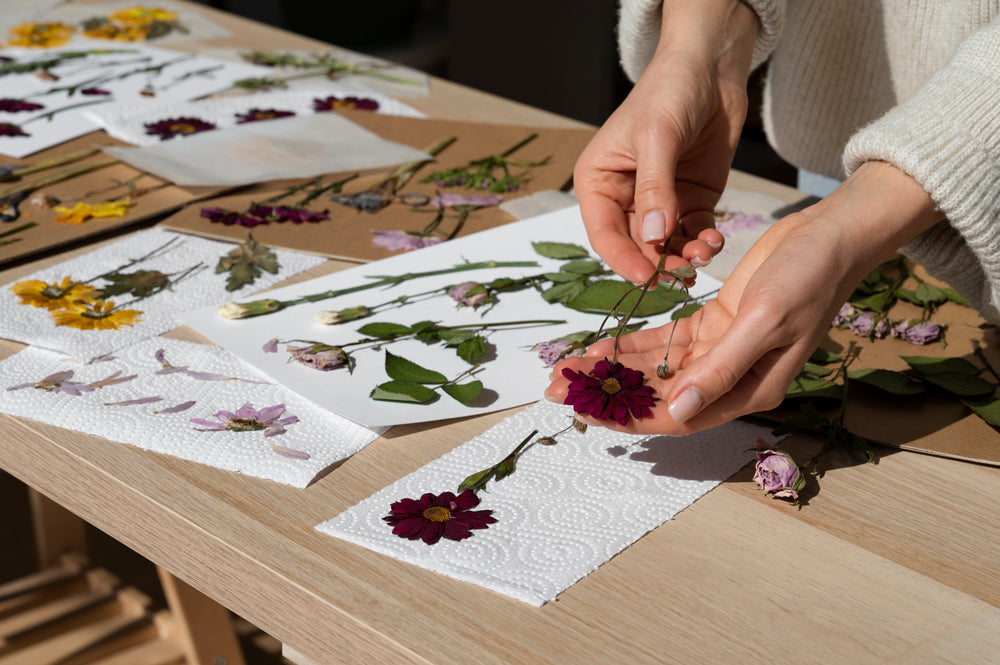
Once the paper is dry, you can trim the edges to create a uniform shape. Some handmade paper artists leave the edges irregular for a more natural look. You can also experiment with adding decorative elements like flower petals or pressed leaves to the paper for added texture and beauty.
4. Advanced Techniques: Experimenting with Texture and Color
Once you’ve mastered the basics of handmade paper, it’s time to experiment with more advanced techniques to give your creations a unique flair. Handmade paper is incredibly versatile, and with some creativity, you can create a variety of textures, colors, and even embedded objects. Here are some ideas for advanced papermaking:
Adding Color
- Natural Dyes: Use plant-based dyes, such as beetroot, indigo, or turmeric, to add color to your pulp. Simply add the dye to the blender when you’re pulping your fibers.
- Powdered Pigments: For more intense color, you can add powdered pigments to the pulp mixture. These pigments can range from earthy tones to bright, vibrant hues.
Experimenting with Textures

- Flower Petals and Leaves: You can press flowers, leaves, or other natural materials into the wet pulp. This adds texture and a decorative touch to the paper.
- Recycled Materials: Try adding shredded newspaper, magazine pages, or fabric scraps to the pulp. This not only creates interesting textures but also promotes recycling.
- Embossing: Once the paper has dried, you can use embossing tools to create raised patterns and designs on the surface of the paper.
Creating Handmade Paper with Embedded Objects
One of the joys of handmade paper is the ability to embed objects into the paper itself. This could include:
- Pressed Flowers
- Feathers
- Textile Scraps
- Metallic Threads or Foil
These elements add a unique touch and can transform simple handmade paper into a work of art.
5. Common Mistakes to Avoid
Like any craft, mastering handmade paper requires practice. Here are some common mistakes to avoid when you’re starting out:
- Too Much Water: Using too much water in your pulp can result in paper that’s too weak and fragile. Strive for a balanced consistency between pulp and water.
- Not Draining Properly: If you don’t drain the excess water thoroughly, your paper may not dry evenly and could end up warped or soggy.
- Uneven Pulp: Ensure the pulp is evenly distributed on the mold. Uneven pulp can result in inconsistent thickness and texture in your paper.
- Over-Pressing: Pressing the paper too much can cause it to become overly flat and lose its natural texture.
6. Applications and Creative Uses for Handmade Paper
Handmade paper is not only beautiful but also functional. There are endless creative possibilities when it comes to using your paper for various projects. Here are a few ideas:
Handmade Greeting Cards
Use your paper to create unique and personal greeting cards. Incorporate pressed flowers, special dyes, or stamps to make each card one-of-a-kind.
Journals and Notebooks
Combine your handmade paper with leather or fabric to create journals and notebooks. The texture of the paper adds a tactile dimension to writing and sketching.
Art Prints and Collages
Handmade paper is perfect for art prints and collages. Its texture adds depth to paintings, sketches, and mixed-media works.
Handmade Stationery
Create a set of elegant stationery for letters and invitations. The beauty of handmade paper makes it ideal for special occasions like weddings or anniversaries.
7. Sustainable Benefits of Handmade Paper
In today’s world, sustainability is more important than ever, and handmade paper offers a number of eco-friendly benefits. By using recycled fibers, natural dyes, and plant-based materials, you can reduce your environmental impact. Unlike factory-made paper, which often uses chlorine bleach and synthetic additives, handmade paper is a renewable and biodegradable alternative.
Moreover, making your own paper from scrap materials, like old newspapers or cardboard, helps to reduce waste and gives new life to discarded items. By embracing handmade paper, you contribute to a more sustainable and eco-conscious future.
Conclusion: The Art of Handmade Paper
Mastering the art of handmade paper is a journey that combines creativity, skill, and a deep appreciation for craftsmanship. Whether you’re making paper as a hobby or using it for artistic purposes, the process can be incredibly satisfying. Over time, you’ll learn to refine your techniques, experiment with different materials, and develop a unique style.
So, gather your materials, get your hands wet, and start crafting your own beautiful sheets of handmade paper. With patience, creativity, and practice, you’ll soon be able to call yourself a true paper-making master.
