
The art of bath bomb crafting is a growing trend that invites both creativity and relaxation into the home. If you’ve ever been enchanted by the fizzing explosion of colors, soothing scents, and the softening sensation a bath bomb provides, you might have wondered: Can I create these magical little spheres of indulgence at home? The answer is a resounding yes! Not only is it possible, but with a few basic ingredients, you can craft custom-scented bath bombs tailored perfectly to your preferences. Whether you’re seeking a spa-like experience, a way to relax after a long day, or simply want to experiment with fragrances and colors, making your own bath bombs is a rewarding and fun experience.
In this guide, we’ll dive into everything you need to know to craft custom-scented bath bombs at home, from essential ingredients and tools to step-by-step instructions and expert tips. Ready to make your own little pieces of relaxation? Let’s get started!
The Ingredients You Need
Before you can start creating your own bath bombs, it’s important to understand the core ingredients that make these fizzy delights work. Bath bombs rely on a chemical reaction between acidic and basic compounds, and they also contain nourishing ingredients that make your bath extra special. Here are the essential ingredients you’ll need:
1. Baking Soda
Baking soda, also known as sodium bicarbonate, is the primary ingredient in bath bombs. It creates the fizzing effect when it interacts with citric acid. Baking soda also softens the water, helping to soothe and soften your skin during your bath.
2. Citric Acid
Citric acid is the acid component that, when mixed with baking soda, causes the fizzing reaction. This interaction is what makes bath bombs bubble and dissolve in your bath water. Citric acid is also beneficial for your skin, as it helps to balance the pH of your bathwater.
3. Epsom Salt or Sea Salt
Epsom salt, or sea salt, is another common ingredient in bath bombs. Epsom salt contains magnesium, which is believed to have relaxing properties, making it the perfect addition to a bath bomb. Sea salt adds a touch of luxury and has natural minerals that promote skin hydration.
4. Cornstarch
Cornstarch serves as a binder in bath bomb recipes. It helps to hold the bath bomb together and gives it a smooth texture. It also helps slow down the fizzing reaction, allowing the bath bomb to dissolve more gradually.
5. Essential Oils
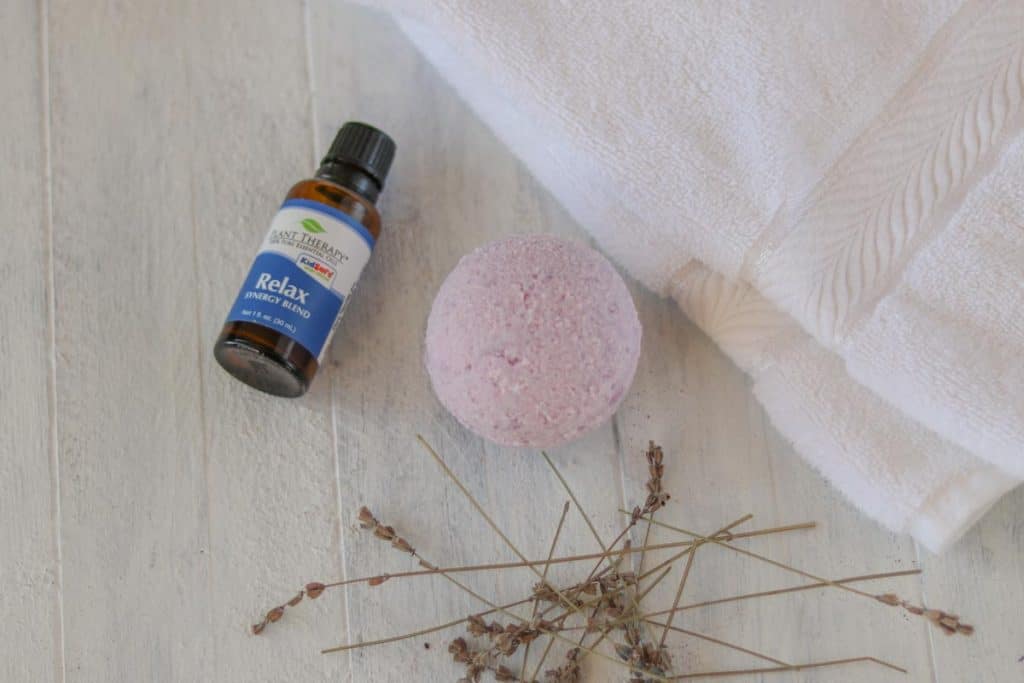
The heart and soul of any custom-scented bath bomb are the essential oils. Essential oils not only provide a personalized fragrance but also offer aromatherapeutic benefits. Lavender, for example, promotes relaxation, while eucalyptus can help clear the sinuses. You can choose oils based on your mood or the effects you want to achieve in your bath.
6. Carrier Oil
Carrier oils such as coconut oil, olive oil, or jojoba oil help moisturize the skin and bind the dry ingredients together. These oils also help the bath bomb’s fragrance last longer in the bathwater.
7. Colorants
For a vibrant, colorful bath experience, you can add colorants to your bath bombs. You can use cosmetic-grade mica powders or liquid food coloring, which are safe for bath use. Just a tiny amount can give your bath bomb a pop of color without staining the tub.
8. Water or Witch Hazel
Water or witch hazel helps to bring the dry ingredients together and form a moldable dough-like consistency. However, you need to be careful with the amount of liquid you add, as too much can cause the ingredients to fizz prematurely.
Tools You Will Need
To create your custom-scented bath bombs, you’ll need a few basic tools:
- Mixing Bowls: Two large bowls, one for the dry ingredients and one for the wet ingredients.
- Measuring Spoons and Cups: For accurate ingredient measurement.
- Bath Bomb Molds: You can buy plastic or silicone molds, or even use muffin tins or ice cube trays if you want to get creative.
- Whisk: A whisk will help to evenly mix the dry ingredients.
- Spray Bottle: For misting your mixture with water or witch hazel.
- Gloves: Optional, but gloves help keep the mixture from sticking to your hands.
Step-by-Step Guide to Crafting Custom-Scented Bath Bombs
Now that you have all your ingredients and tools ready, it’s time to start crafting your bath bombs! Follow these easy steps for a delightful homemade creation:
1. Prepare Your Dry Ingredients
In a large mixing bowl, combine the following dry ingredients:
- 1 cup baking soda
- 1/2 cup citric acid
- 1/2 cup Epsom salt or sea salt
- 1/2 cup cornstarch
Whisk them together until the mixture is smooth and free of lumps. It’s essential to get these ingredients evenly mixed to ensure a consistent texture throughout your bath bombs.
2. Add Essential Oils and Carrier Oils
In a separate smaller bowl, combine your essential oils with the carrier oil. The amount of essential oil you use depends on the strength of the fragrance you desire. Typically, 15-20 drops of essential oil per bath bomb will suffice.
- For relaxation, try lavender or chamomile.
- For an invigorating experience, peppermint or citrus oils like orange or lemon work wonders.
Add the oil blend to the dry ingredients and mix thoroughly. Be careful not to add too much liquid at this stage, as it can cause the mixture to start fizzing prematurely.
3. Color Your Bath Bombs (Optional)
If you want to add color to your bath bombs, now’s the time to do it! Add a small amount of your chosen colorant (mica powder or food coloring) to the dry mixture. Be cautious with the quantity – you can always add more, but you can’t remove it once it’s in there.
Mix the colorant in thoroughly, ensuring the color is evenly distributed.
4. Mist with Water or Witch Hazel
Using a spray bottle, lightly mist your mixture with water or witch hazel, one spritz at a time. Mix gently after each spray to avoid starting the fizzing reaction. You want the mixture to resemble wet sand—just enough moisture for the ingredients to hold together when pressed into a mold.

5. Press the Mixture into Molds
Once your mixture has reached the right consistency, it’s time to mold it into bath bomb shapes! Pack the mixture tightly into your chosen mold. If you’re using a two-part spherical mold, fill each side with the mixture, then press the halves together firmly. If you’re using muffin tins or ice cube trays, simply press the mixture into each compartment.
Let the bath bombs sit in the mold for 24-48 hours to dry completely. Be patient – the longer you let them dry, the better they will hold their shape.
6. Remove from Molds
Once the bath bombs are completely dry and hard, gently remove them from the molds. Be careful when handling them, as they can be fragile. If you used a spherical mold, gently twist to release the bath bomb.
Tips for Perfect Bath Bombs
Creating custom-scented bath bombs is an art, and there are a few expert tips to keep in mind to ensure you get the best results every time.
- Don’t Over-wet the Mixture: Adding too much liquid can cause the bath bombs to fizz prematurely. Keep the moisture to a minimum, and add it gradually.
- Store Properly: After they’re dried and removed from the molds, store your bath bombs in an airtight container to keep them fresh. Humidity can cause them to activate, so keep them in a cool, dry place.
- Experiment with Scent Combinations: Feel free to experiment with different essential oil blends to create your signature scent. Some great combinations include lavender and eucalyptus, orange and peppermint, or rose and sandalwood.
- Try Different Shapes and Sizes: Use different molds to create unique shapes – from classic spheres to hearts, stars, or even flower-shaped bath bombs. Your bath time is your canvas!
Why Custom-Scented Bath Bombs Are a Great Idea
Crafting your own bath bombs doesn’t just offer a creative outlet; it also has several benefits. Here’s why making custom-scented bath bombs is a fantastic choice:
- Personalization: By making your own bath bombs, you have complete control over the ingredients, scents, colors, and shapes. You can tailor them to suit your preferences and even create themed bath bombs for gifts or special occasions.
- Natural Ingredients: Commercial bath bombs often contain synthetic chemicals, fragrances, and preservatives that can irritate the skin. Making your own bath bombs ensures you’re using only natural, skin-friendly ingredients like essential oils and carrier oils.
- Relaxation & Wellness: Bath bombs can be infused with essential oils that promote specific benefits, from relaxation and stress relief to skin hydration and muscle relaxation. Creating your own blend allows you to target your specific wellness needs.
- Cost-Effective: Store-bought bath bombs can be expensive, especially when you opt for high-quality ones. By crafting your own, you save money and get to create more at a fraction of the price.
- Eco-Friendly: Many commercially produced bath bombs come in plastic packaging. When you make your own, you can use eco-friendly containers or avoid packaging altogether, reducing your carbon footprint.
Conclusion
Crafting your own custom-scented bath bombs is an easy, fun, and rewarding project that not only allows you to explore your creativity but also gives you the opportunity to enjoy personalized, luxurious baths at home. With a few simple ingredients, you can experiment with scents, colors, and textures that suit your mood and needs. Whether you’re indulging in a self-care moment or preparing homemade gifts, bath bomb crafting is a creative and enjoyable way to bring relaxation into your life.
Start experimenting today, and create bath bombs that perfectly match your personality. Happy crafting, and may your baths be filled with fizzy joy!
